


If you are a modern and stylish person, a lot of useful goatskin items are around you. Sofas, armchairs, and couches are essential parts of your luxury, cozy room design; belts, men’s bracelets, shoes, jackets, gloves, purses make your original image. High-end car and motorcycle seats are commonly made of leather, as this natural material is durable, easy to clean, and hard-wearing.
Meanwhile, your favorite stuff wears out and fades in several years, anyway. Cracks, scratches, cuts, rips, and holes may appear with time, especially if you use your favorite items heavily. Don’t be upset! These issues can be quickly restored with the help of a well-suited repair kit. So, let me review the best leather repair kits that meet all of your sheepskin renovation needs: recoloring, restoring, scratches and rips covering, tears and burns fixing.
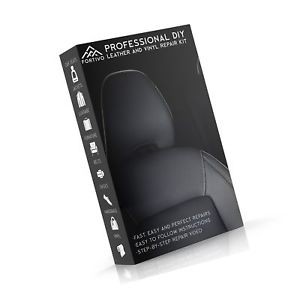
Fortivo Leather and Vinyl Professional Kit: The Best Air Dry Repair Kit for Leather & Vinyl
 Whenever you are a leathercraft professional or use a lot of the high-end natural stuff, a versatile renovation kit, like the one from Fortivo, is to be always at hand. The set includes 7 non-toxic colorants, fast-drying, water-based. A patch of leather, some backing fabric pieces, a spatula, and a mixing bottle are beneficially available.
Check Price on Amazon!
Therefore, you can select any of the 3 common leather repair methods, depending on the damage severity. The instructions included are quite clear; a helpful video is available online. The only problem is to mix the compounds to match the tint of the item, being renovated. Quite naturally, the shade mixing guide enclosed helps you for sure.
Additionally, get some leather wax and rubbing alcohol beforehand. Graining paper would also be useful. 5 ml of every dye paint may seem to be a droplet (it takes only about 0.17 oz.); however, it’s sufficient for a minor rawhide surface repair.
Generally, the versatile repair kit is highly recommended, as the solution is safe, fast drying; the bonds are reliable and durable.
| Pros | Cons |
| efficient to create a strong, permanent bond; | not easy to match the shade; |
| versatile; | no graining paper, wax and rubbing alcohol. |
| non-toxic solution; | – |
| intuitive to understand instructions. | – |
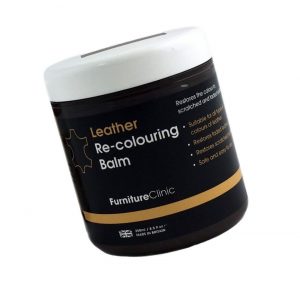
Furniture Clinic: The Best Leather Repair Kit for Car Seats
Having got only one leather coach or car seat to be repaired, select this top-quality balm for refinishing application. Any jacket or sofa surface wears out, gets faded, so, it’s great to renew its glare still before any rips or holes appear.
Check Price on Amazon!
The balm is not the most affordable, but you get generous 8.5 ounces of the essential solution. Meanwhile, select the only one of the 21 tones available. So, it’s great to use it on the large furniture surface, or when you prefer the monochromatic leather material, for example, black or dark brown.
The solution is safe and efficient. It’s top-quality, made in Great Britain, colorfast. After the balm application, the furniture remains bright and good-looking during up to 3 years. Additionally, it can be applied to all types of soft sheepskin. The liquid is to soak in, for the perfect results. If the surface is perforated, the look would be awful, anyway.
The recoloring balm is easy to use: apply some solution to the clean surface and buff it. A cleaner and a protection cream are offered to be purchased additionally. Thus, the leather repair kit is recommended for minor damages refurbishing, as it’s safe and efficient.
| Pros | Cons |
| effective; | a polishing solution is required; |
| 21 colors are offered to choose from; | not easy to select the best shade match due to monitor distortion. |
| works on all types of water-absorbent leather. | - |
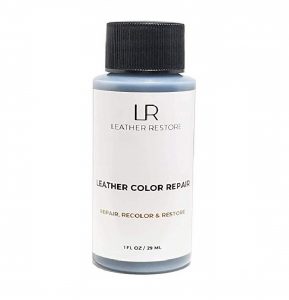
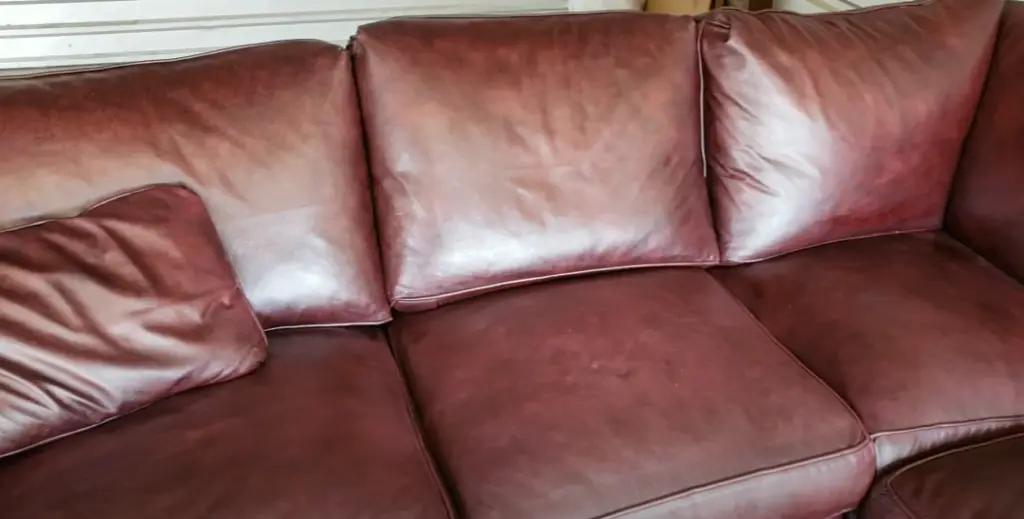
Leather Restore Colorant: The Best Leather Repair Kit for Couches
Going to renew your leather shoes, chair seat or couch, consider purchasing of these premium colorants. They are beneficially made in the USA, being safe, top-quality, and efficient. It is easy to use, versatile, and perfectly washable off your hands after the repair.
If I compare it to the Furniture Clinic item, it’s similar in terms of the multiple colors selection.
The bottle is a bit smaller: 1 oz. is sufficient for up to 2” * 2” color-rubbed goatskin surface. A 4-oz. bottle would last for long. So, you can select a suitable tint, or mix several ones to get the best possible match.
The leather repair kit is easy to apply; several layers may be necessary, as they are thin. However, no polishing solutions are required, the colorants dry fast. No leatherworking tools are needed to revitalize your old, scratched, or full leather stuff. So, I positively recommend the product.
| Pros | Cons |
| wide selection of tints; | some shade matching issues; |
| made in the USA; | several thin coats of paint are necessary. |
| a bottle is sufficient for a large area of scratched or peeling material. | - |
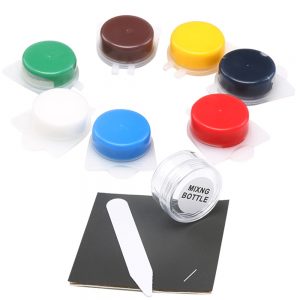
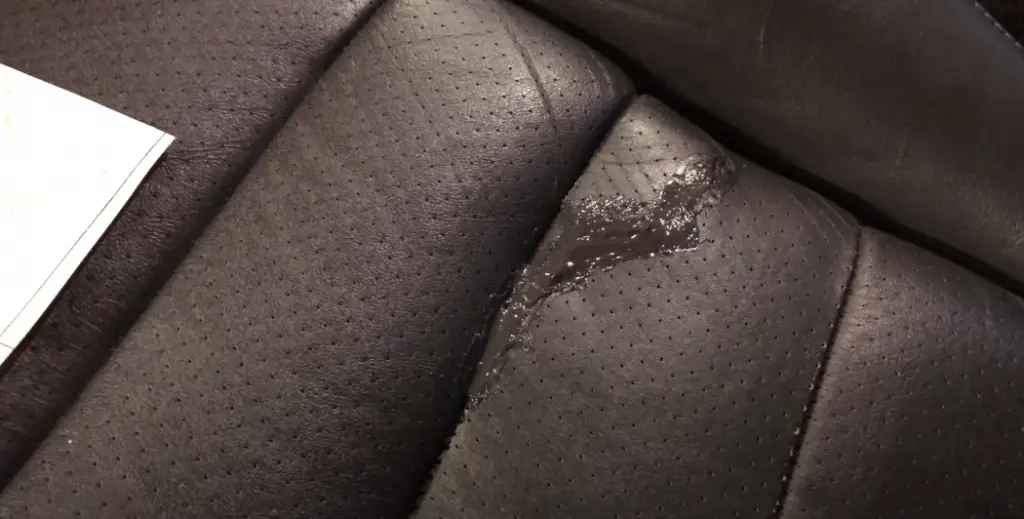
Coconix Leather and Vinyl Repair Kit: The Best Leather Repair Kit for Furniture
The leather repair kit is unique as it helps to fix minor holes, cracks, and burns on furniture, accessories, footwear, clothing easily. It consists of 7 essential tint compounds that can be mixed for the perfect results. An applicator and a mixing cup are included in the package.
Small and medium-sized rips can be fixed easily by applying several coats of color mix. The compounds work on any leather materials: genuine and faux. After processing, it smells and looks good. Additionally, the instructions are quite intuitive to understand, and the set application is as simple as possible.
Quite naturally, the solution quantity is not high-cube, as the total package weight is 3.84 oz only, but the kit to repair leather is efficient. Professional, uniform results are guaranteed.
| Pros | Cons |
| small burns, cracks and holes can be fixed efficiently; | mixing tints is time-consuming; |
| easy instructions; | the small amount of every compound available. |
| intuitive to apply; | - |
| works on all kinds of goatskin materials. | - |
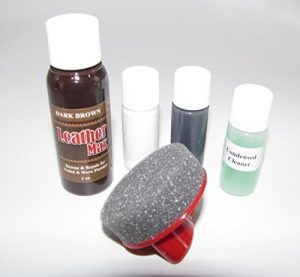
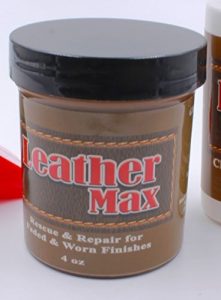
Leather Max: The Most Complete Goatskin Repair Kit
The set contains 3 brown shades, a Cleaner & Conditioner concentrate, a restorer, a filler compound, a sponge applicator and 2 swabs to mix and test the colorant. Therefore, all kinds of damages: tears, scratches, rubbing marks can be efficiently fixed.
As the video instructions are available online, I think they are really clear. Just don’t forget to clean the surface before the colorant application, adding some drops of the concentrate to the water, and let the solution dry thoroughly. Once again, the colorants are water-based, safe, and non-toxic. So, the set is perfect, multi-purpose, and full-scale.
| Pros | Cons |
| sufficient (1 oz.) colorants’ bottles; | a top coat sealer is still desirable; |
| exact tint match; | the filler and cleaner quantities are too small. |
| all the necessary solutions are included; | - |
| full video instructions. | - |
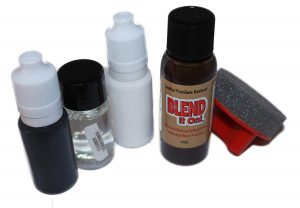
Blend It On: A Reduced Sheepskin & Vinyl Refinishing Set
The leather repair kit is very similar to the previously reviewed one. It includes the same Leather Max Colorant Bottle, the Cleaner, Filler and the Restorer. The round-shaped sponge with the handy grip is beneficially available.
The difference is only in the compounds quantity. This kit contains only one shade. Thus, if you are sure in the exact tint match, you can save on the refinishing solution.
As to the instructions, it’s possible to follow the video commercial for the previous set, as the process is ultimately the same, fast and straightforward. Just wait until the colorant dries completely; otherwise, can be rubbed-off easily as it’s water-soluble.
| Pros | Cons |
| affordable; | the bottles are too small for large projects; |
| the surface looks and feels original after the drying out; | 1 shade may be insufficient for the great match. |
| clear and complete video instructions. | - |
Mega Goatskin Refinishing Kit: The Best Leather Repair Kit for Large Projects
The same colorant and cleaner solutions again? Yes, it’s the well-known Leather Max. The refinishing agent comes in a 4-oz bottle that is great for oversized furniture, car seats, armchairs. Fortunately, 2 oz. of the cleaner concentrate and a sponge applicator are available.
However, as the kit does not contain the filler, it is efficient only on scratches and rubbing marks, spots and rubbed the surface. Holes, tears, and burns can’t be fixed this way. Additionally, the color is difficult to select online, as all monitors are different.
| Pros | Cons |
| sufficient for large couch or armchair areas; | doesn’t work on tears and holes; |
| easy to apply; | the second coat of the refinisher is necessary. |
| safe, non-toxic, water-based compound. | - |
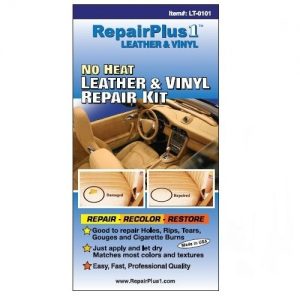
RepairPlus1: The Strongest Bonding Repair Materials
What can make a powerful repair, fixing cigarette burns, tears, and holes? But for the patch of matching material, only a filler can solve this task. Thus, the set includes 7 bright colorants, a mixing cup, some pieces of grain backing fabric, a standard, plastic spatula, and some filler matter.
The containers are tiny; the colors are bright. It would be not easy to mix them, matching a typical furniture upholstery shade like beige or brown. A mixing chart is available, and I hope it helps.
The assembly is minimal. However, it’s affordable, versatile, and efficient, helpful to make strong, permanent joints. So I recommend it for small-area damages, occasional use only.
| Pros | Cons |
| helps to make strong joints; | very small containers; |
| suitable to fix burns, tears and gouges; | the colorant shades are bright. |
| affordable. | - |
Yaonow Compounds: The Best Leather Vinyl Repair Kit Under $8
Being just a typical person, but not a leatherworking professional that crafts various high-end, homemade items every day, you may still want to renovate your favorite goatskin stuff. Not the minor, but small-area damages and rubbing marks that appear in some years on your gloves, sandals, belts, wristbands and steering wheels can be easily fixed using this versatile and full-scale kit.
Quite naturally, the 7 bottles with the colored compounds are tiny. The whole parcel weighs only about 3 oz. However, the set is multi-purpose and comprehensive: it includes a spatula, a mixing bottle, several pieces of lining fabric and grain paper.
The colorants are intermixable, so you can match the necessary tint, even if it’s not so easy and fast. All kinds and grains of goatskin can be refurbished, with this repair tool. Even tears and cigarette burns can be fixed, using the fabric and the compounds. Additionally, the sheepskin renovation set is amazingly affordable. So, it’s highly recommended for occasional projects, or to recolor small-area spots and marks.
| Pros | Cons |
| affordable; | the tiniest bottles ever; |
| multi-purpose; | bright colorants, difficult to match the original. |
| strong bonds can be made. | - |
123Repair: A Long-Lasting Kit for DIY Repairs
When serious damages, like holes, abrasions, cracks, tears appear, a patch of leather can be necessary to fix it. This renovation kit contains it for sure!
It includes also:
- a piece of cotton backing fabric;
- 7 basic-shade repair pastes;
- a heat transfer stamp;
- some adhesive.
A mixing tin and a spatula, as well as several different texture paper sheets, are certainly included. The manual is multilingual, detailed, and clear. The set is sufficient for 8-10 significant repairs. So, it’s recommended for continuous and frequent use, professional or DIY projects.
| Pros | Cons |
| top-quality (made in Germany); | expensive price; |
| complete and multi-purpose; | the colorants’ amount is not generous. |
| user-friendly and easy to use. | - |
Best Leather Repair Kits - Buyers’ Guide
Selection of the best, well-suited and complete leather repair set may be a daunting, intricate task, as it’s difficult to identify the color and the sheepskin match precisely. The materials quantity is also difficult to estimate, as the bottles’ capacity and the patches’ sizes are mentioned not by all manufacturers.
First of all, think about the leathercraft repair tools application, the original material behavior, and kind of damages. All leather repair kits are different. Some of them are suitable to fix scratches and rubbing marks only, refurbishing the surface. The other ones can cope with burns and holes.
Additionally, consider the set’s:
- versatility;
- compatibility;
- components enclosed;
- price-quality ratio;
- tone spectrum.
Some tools assemblies work on leather only, the other ones are applicable for vinyl, as well. Thick leather is more difficult to repair, as this work may require the use of strong glue for leather to make an excellent and reliable bond. However, the natural rawhide material is strong and durable, not prone to scratching and discoloration.
All the leather repair kits I recommend herewith are water-based, air-dry, non-toxic and environment-friendly. However, they are water-soluble, before the colorant coat dries completely. The solution can be ripped off within the nearest hours or days. Therefore, it’s recommended to wait for not less than a night for complete drying out.
An additional level of the compound may be necessary if the scratches or rubbing marks are not completely covered. The paint commonly becomes darker after drying. Additionally, a task-orientated finishing solution, recommended by the manufacturer, may be necessary to avoid any rubbing off impacts.
Finally, a tone mixing scheme may be helpful, but it’s not easy to match the original tint, mixing several of 7 bright shades. It could suit some bright clothing or accessories renovation. Otherwise, I would better prefer 21 tints’ assemblies or the 3 similar shades kits.
Leather Repair Kits FAQ
How to Choose the Right Leather Repair Kit
You must choose a leather repair kit that is compatible with your damaged leather. Most heat cure leather repair kits include colored compounds and grain patches. These add-ons enable users to create a patch that closely matches their damaged leather. Since leather can be both hard and soft, you should always select a kit that comes with an optional hardener. If you're dealing with textured leather, grain paper will also help your patch blend into the surrounding leather.
Be wary of online reviews. On the internet, it is hard to identify authentic, purposeful feedback. However, keep track of patterns of compliments and complaints. If 100 people agree that the heat transfer tool is insufficient, there may be some truth to this claim.
Always opt for a high-quality leather repair kit. Take your time to read the directions and perform the tasks according to the manufacturer's recommendation. With a little practice, you'll be able to to create repairs that blend seamlessly with original leather.
How to Use a Leather Repair Kit
First, you must prep the damaged area. Use an alcohol swab to remove stuck-on dirt and grease. Then, trim away any loose threads.
Apply a backing patch to the backside of the leather. Then, use the vinyl adhesive to permanently attach the patch. When the adhesive is dry, mix the filler compounds till they match the color of the damaged leather. Refer to the blending booklet for expert color tips.
After that, select a grain paper that resembles the damaged leather. Apply the color-matched filler in thin laters. Then, rest the grain paper on the surface of the wet filler. Use the heat transfer tool to heat the filler and make a textured imprint.
If you are using an air-dry leather repair kit, clean the damaged leather and apply a liquid binder. Allow the leather binder to dry overnight.
How to Use a 3M Leather and Vinyl Repair Kit
The 3M Leather and Vinyl Repair Kit is perfect for fixing up cut, ton, or burnt automotive upholstery. The kit comes with all the supplies, tools, and directions you need to fix leather or vinyl. You don't have to worry about choosing an exact color match. The 3M kit comes with seven colored repair compounds and a color blending booklet. It also features a variety of grain papers for creating custom textures.
To get started, clean and trim the damaged leather or vinyl. Then, trim the backing patch so that it extends around beyond the border of the damaged area. Insert the patch behind the leather. Then, apply a thin layer of the vinyl adhesive.
Once the vinyl adhesive has cured, mix the filler compounds to create a color blend that matches the damaged leather. Apply the compound to the damaged area. Then, select a matching grain paper and prep the heat transfer tool. Rest the heat transfer tool on a hot iron. Then, run it across the grain paper. This will cure the patch while leaving a textured impression.
How to Fix a Ripped Leather Couch Using a 3M Repair Kit
You can also use the 3M Leather Repair Kit to fix a ripped leather couch. First, use rubbing alcohol to clean the damaged area. Then, use scissors to trim away any loose threads or pieces of leather. Create a smooth perimeter around the damaged area.
When you are finished, trim the backing patch so that it fits under the damaged leather. The patch should extend ½ inch from the hole. Apply a thin layer of the vinyl adhesive between the patch and leather. Then, wait for it to cure.
After that, use the color compounds and mixing guide to create a filler that matches the pigment of your leather couch. Apply a few thin layers of filler to the damaged area. Finally, select a grain paper and preheat the heat transfer tool. You will need a hot iron to complete this task. A proper patch will improve the aesthetic of your couch while preventing the rip from spreading.
How to Use a Vinyl and Leather Repair Kit for a Tonneau Cover
You can also use a vinyl and leather repair kit to repair a small tear, crack, or burn in a tonneau truck cover. First, clean the cover with soap and water. Then, run an alcohol pad over the damaged area. Do this to remove any dirt or oil that is stuck on the surface.
After that, use scissors or an Exacto knife to tidy up the torn edges. Next, insert the backing square into the hole. If necessary, trim the patch. Then, mix the color compounds to create a pigment that resembles the color of your truck bed cover.
Apply a few thin layers of the colored compound. Then, select a grain patch that resembles the texture of your tonneau cover. Finally, use heat transfer tool to cure the filler.
How Good is a Permatex Leather Repair Kit?
The Permatex Leather Repair Kit comes with everything you need to repair rips, tears, and buns on leather and vinyl. The majority of buyers give the kit five stars. However, some people have complained about the heat transfer tool. Many buyers have said that it does not transfer heat well. What's more, some people have been unhappy with the results of their Permatex Leather Repair Kits.
With that said, the Permatex is virtually the same as any other leather repair kit that requires a heated cure. If you follow the directions closely and take your time, you can use Permatex to create reliable leather patches.
How to Use a Permatex Leather Repair Kit
First, prepare the damaged area by removing any dirt and grease. Use soapy water and alcohol to remove stubborn dirt. Then, dryry the area. Trim away any loose threads or burnt leather. bits Then, place the backing patch behind the damaged area. Use the spatula tool when inserting it behind leather upholstery.
Select a grain paper pattern that is closest to the damaged leather. Then, fill the damaged area with clear vinyl adhesive. After that, use the seven color repair compounds to create a pigment that matches the color of the original vinyl. If necessary, mix in 20% hardener.
Plug in the heat transfer tool and wait for it to heat up. Then, place the grain paper on top of the filler patch. Run the hot heat transfer tool over the filler. Then, wait for the area to cure and cool.
How to Use a Heat Cure Leather Repair Kit
Start by cleaning the damaged area. Wipe down the surface and trim away any loose ends. Then, trim the canvas backing patch so that it extends ¼ to 1/2 inch beyond the damaged area.
Insert the backing patch into the damaged area and apply a thin layer of adhesive. Allow the vinyl adhesive to cure. Then, select a grain paper that resembles the damaged leather. Take the time to trace the shape of the damaged area on the grain patch.
Use the color compounds to create a filler that matches the pigment of the damaged leather. Apply the color-matched filler to the damaged area. Place the grain paper on top of the filler. Warm the heat transfer tool on a hot iron. Then, run the hot heat transfer tool over the filler. This cures the filler and produces long-lasting leather-like results.
What is Better: A Heat or No-Heat Leather Repair Kit?
There are two main types of leather repair kits, including heat and air dry kits. Many people prefer air dry leather repair kits because they are less likely to damage leather. However, both kits create resilient, long-lasting patches.
What's more, heat cure leather repair kits enable you to create a textured surface. If you're dealing with grainy leather, then this is the only way to ensure that your repair blends into the existing leather. Considering all this, we believe heat cure kits are superior.
What is the Filler in Leather Repair Kits
The filler in leather repair kits is made from PVC, or polyvinyl chloride. The PVC is mixed with several phthalates. These chemicals help to give the PVC its soft, leather-like feel. Since PVC has a high viscosity, you must use heat to cure it in place. Most leather fillers have added pigments. Therefore, the colors can be mixed to create a percise color match.
How Good are Leather Repair Kits?
At this point, you’re probably wondering whether or not leather repair kits work. These leather repair kits make it possible for consumers to patch damaged leather. In doing so, they offer an affordable way for consumers to improve their damaged leather goods.
Of course, most leather repair kits pose a mild learning curve. With that said, some of the kits come with a test piece of vinyl. This practice patch enables consumers to work on their leather repair techniques before working on their actual repair.
Professional leather repair services can be expensive. Still, the professionals rely on products that are identical to those in leather repair kits. If you take your time and follow directions, your leather repair kit can yield professional-grade results.
Video Guide: Using Leather Repair Kit
Conclusion
I think the best leather repair kit for frequent or professional use is the 123Repair set. It’s complete, including a patch of material and all the necessary accessories. For minor and occasional application, attributed to minor, small-area damages, I would recommend the assembly from Yaonow Company. It’s the most affordable but versatile and sufficient for DIY projects.
Poll
[forminator_poll id=”2625″]References:
Conservation and Restoration of Leather Objects
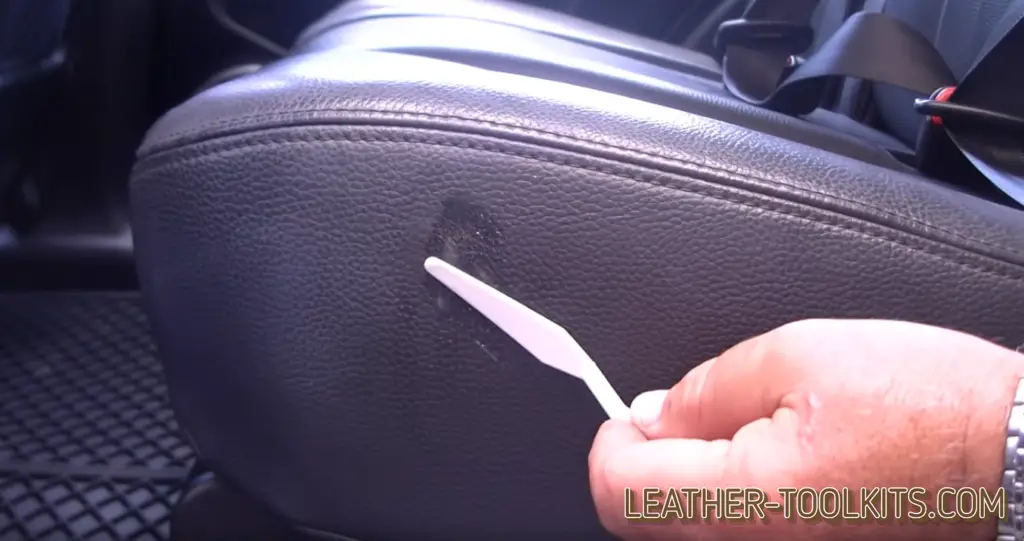
4 Ways to Repair Leather Car Seats
Leather Repair Thread on Auto Geek Online Forum
The Mega Goatskin Refinishing Kit worked so great on my leather armchair in the kids’ room. That thing just gets used so much and it has so many good memories associated with it that I couldn’t just replace it. This kit helped bring it back to life!
I had a hard time finding a color that would match closely with my leather couch in my family room, but the Leather Restore Colorant had like the perfect shade. I purchased the one I thought matched it best, and it worked perfectly.
I used the Leather Restore Colorant on all my kitchen chairs, and it worked like a charm. It turned them just a bit darker, but I prefer it now. Super easy to use and restores the shine.
Hello, Laura! Thanks for your comment. In my opinion, it is one of the best solutions for leather furniture repairing.
The Leather Max set helped me out so much! The shape match was perfect and cleaned up a small scratch in no time.
Thanks so much for going so in-depth with the analysis of all these different repair kits. I found this article super useful, and it provided me with a ton of great information. Once again, thanks so much!
Hello, Jose! Thanks for the comment.
I’m in need of a leather repair kit to patch up my armchair and ottoman. Thank you for the options! I’m most concerned with finding something that will give me a seamless finish that won’t be too noticeable.
Go Fortivo, go! I love this brand. When it comes to a leather repair kit this will beat anything, I think. I have not yet tested everything on the market to be certain, but I did test a few of the more known ones and this is number one.