Whether you’re looking to upcycle or restore a suede product, it’s imperative that you choose a specially formulated suede dye to get the job done. We promise that dying suede is far easier than it looks. All you need to get started is some spare time, some elbow grease, and a quality suede dye. To make things easier, we’ve brought you the top suede dyes on the market.
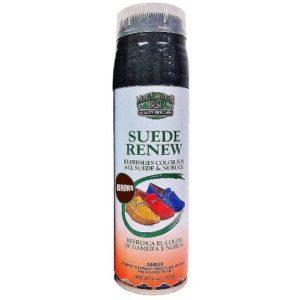
Moneysworth & Best Suede Renew Dye – Editor’s Choice
 Moneysworth & Best is a family-owned company with hundreds of fabulous shoe-care products. Moneysworth’s Suede Renew spray is the perfect product from primping worn or damaged footwear. It is even available in standard black and brown.
Each 5-ounce bottle of Renew includes a plastic brush for prepping the suede before the dying process. Meanwhile, the dye comes in an easy to use an aerosol spray can. We recommend applying multiple coats to achieve a rich, luxurious color coverage.
| Pros | Cons |
| Available in black and brown | – |
| Renews and revitalizes suede and Nubuck | – |
| Provides a stain-resistant, waterproof barrier | – |
| Keeps leather soft and flexible | – |
| Comes with a built-in suede brush | – |
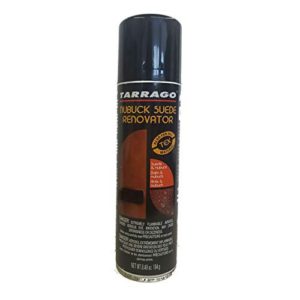
Tarrago Suede and Nubuck Renovator Spray – Best Budget Pick
 Tarrago Renovator is yet another reliable suede dye spray. Tarrago is available in 8.45 (250 milliliters) spray bottles. Color options include beige, black, Bordeaux, dark brown, medium brown, navy, and red. Tarrago replenishes the natural oils and colors in suede.
A few coats of this premium product will have your leather products looking better than new.
Tarrago is a super affordable option for individuals looking to give their suede shoes a new life. While it doesn’t come with a prep brush, we recommend using one before and after each application. Use caution when using this spray dye, as it contains industrial-strength color concentrates.
Spray dyes like Tarrago work best to revive rather than alter the color of suede or nubuck. This nourishing oil-based formula helps to rejuvenate dry leather fibers. What’s more, it gives them strength and flexibility. It works best when applied with a clean microfiber cloth.
| Pros | Cons |
| Available in a range of colors | Must buy a prep brush |
| Dries fast | – |
| Does not infringe a material’s breathability | – |
| Creates a waterproof barrier | – |
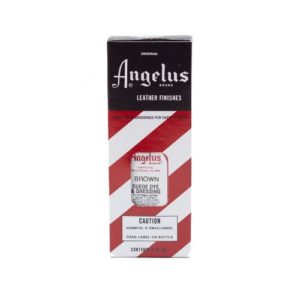
Angelus Suede Dye and Dressing Applicator – Top-Rated Shoe Dye
 The first thing we noticed about Angelus Brand Leather Finish was its vintage packaging. This suede dye has a surprisingly old-fashioned look. Nevertheless, it has made many cameos in DIY Jordan repair videos on YouTube. It’s also priced low for such a robust and long-lasting color formula.
Angelus Leather Finish comes in a 3-ounce twist-top plastic bottle. An easy to use applicator comes with the dye. Yet, you will need to buy a suede brush to properly prep your suede for dying. The formula can coat any type of suede footwear. It only takes a few coats to bring tired, worn shoes back to life.
The Angelus suede dressing works best when applied evenly with a stiff brush. There are several colors to choose from, including brown, black, and red. It does not detract from the naturally nappy texture of leather. What’s more, it does not make suede stiff.
| Pros | Cons |
| Uses oils to rejuvinate suede and nubuck | Must buy a brush |
| Vibrant color formulas | – |
| Industrial-strength dyes | – |
| Creates a waterproof barrier | – |
| Dries fast | – |
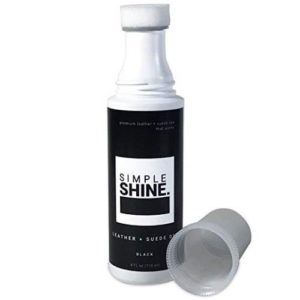
Simple Shine Leather Dye – Best Built-In Applicator
 Simple Shine is a pigmented formula that is designed to hide scuffs and scratches on shoes, boots, and much more. It features a built-in plastic applicator that enables users to spot treat their suede products. Keep in mind that the rich color formula provides permanent coverage.
We love that this suede treatment doesn’t run. It dries quickly and sets permanently. What’s more, it keeps leather soft and supple. The effect is a rich, slightly glossy finish that makes aging suede look like it came right off of the store shelf. This dye is even backed by a 100% customer satisfaction guarantee.
| Pros | Cons |
| Built-in applicator | Limited color options |
| 100% customer satisfaction guarantee | – |
| American-made | – |
| Dries quickly | – |
Fiebing’s Suede and Roughout Dye – Time-Tested Favorite
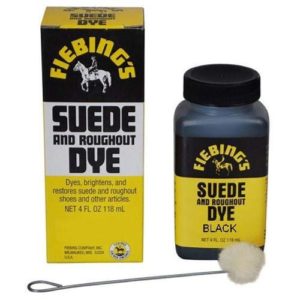
 Fiebing’s Suede and Roughout Dye is designed to breath new life into worn leather products. Each 4-ounce jar comes with a metal and wool dauber that can be used to apply the dye to the leather goods of your choice. It is important to remember that Fiebing’s is highly concreted and long-lasting substance.
It will never peel, crack, or fade. What’s more, it will help suede retain its flexible, soft structure.
Fiebing’s black and yellow packaging may look like something out of a different era, but its rich, vibrant color formula has stood the test of time. Not only does it brighten and enrich material, but it also helps it to restore suede’ naturally soft yet resilient texture. You don’t need to fear using this on items that are going to be exposed to the elements. After all, it’s a waterproof stain won’t drip or run.
Fiebing’s uses an alcohol-based formula that goes on evenly. It dries quickly, making it easy to apply multiple layers. What’s more, it has a uniform appearance that resembles expertly manufactured suede and nubuck goods.
| Pros | Cons |
| Restores and revitalizes suede and roughout leather products | Average color coverage |
| 21 unique color formulas | – |
| Comes with a wool-tipped dauber | – |
| Made in the U.S.A. | – |
| Dries fast | – |
Buyer’s Guide
Using dye can daunting, but it’s not impossible. If you have the time and patience, you use suede dye to completely reimagine thrift store finds or revitalize old favorites. Of course, the best way to guarantee the success of your project is by garnering the right tools and dyes for the job.
Helpful Tips for Dying Suede
A Dye is only as Good as its Applicator
For the most part, suede dyes come in two varieties: those you spray on and those you rub on. When held at the right angle and distance away from the suede, spray dyes can be rather effective. Of course, using a spray requires a bit of skill. As such, it is not always the best choice for individuals looking to dye suede accessories with intricate details and built-in accessories.
On the other hand, rub-on dyes can be applied with daubers, brushes, and other applicators. Occasionally, manufacturers include a built-in applicator or complimentary dauber. Other times, you will need to buy a separate dauber to do the trick. Toothbrushes are an inexpensive alternative to official suede dye applicators.
Protect Your Skin
Suede is a type of leather, and leather is a type of skin. As such, any dye that is designed to permanently penetrate suede is probably going to do the same to your hands. Wear gloves and work slowly.
Be Consistent
When a suede dye is applied inconsistently, it may look as though it is oversaturated in some places. These dark or uneven sections seriously detract from a finished look. To avoid creating unsightly blotches, apply small, even amounts. Use circular strokes to avoid creating obvious brushstrokes.
Let Each Coat Dry
It is important that you let each coat of dye dry completely before applying the next. Most manufacturers recommend that you wait at least 24 hours between coats. Some dyes appear darker when they are wet. So it is important to let your dye dry completely to ensure that you can achieve the color you desire.
Don’t Overdo It
Try not to dye a pair of shoes or an accessory more than once. Too many coats of chemical dyes can do irreparable damage to a leather product. It’s always best to settle on a timeless dye hue.
FAQs
How do I protect contrasting logos and stitches?
It’s difficult to protect contrasting stitches when applying suede dyes. Although, you can use tape to prevent dye from penetrating large logos with clear borders. Even so, most dyes will penetrate accent stitches. Depending on their original color, they may appear to be a different shade than the leather.
How many coats of dye do I need to apply?
Most suede dyes are very concentrated. Still, you may need to apply several coats to achieve the shade you desire. Suede dye penetrates deep below the surface of the material. As such, it often takes multiple bottles of product to dye large projects.
How do I know if the dye I bought is the right color?
Test your dye in an inconspicuous spot or piece of unneeded suede. You can also mix different colors together to create a custom hue. Make sure to settle on the perfect recipe before smothering dye all over an irreplaceable object.
Should I apply a finisher or waterproofing product after dying suede?
Some dye manufacturers recommend that you remove the existing finish from your suede before applying the new dye. In such cases, we recommend applying a coating of suede protector or waterproof sealant after the suede dye dries. Many suede dyes also act as waterproof barriers and protectants. A waterproofing spray will also give your suede longtime color security.
How do you prepare suede or nubuck for the dying process?
Use a brush with hard bristles to remove any dirt or debris from the surface of your suede. Be sure to disrupt the natural grain of the suede to lift up any deep-set dust. It is far easier for the dye to adhere to clean fabric.
What should I do to avoid dying any accessory attachments?
Whether you are dying a pair of shoes or a purse, there is a strong chance that there are external accessories that you don’t want to be dyed. Remove shoelaces and other accessories that are easily reattached with ease. After that, use painter’s tape to prevent the dye from penetrating any built-in accessories. Examples of these include zippers, buttons, and pull.
Final Thoughts
Have you ever given away or tossed out a suede item because it looked worn or outdated? Have you ever passed up a suede product because it wasn’t the right color? Dying suede is one of the easiest and most inexpensive DIY projects. This simple technique can completely revitalize or reinvent lackluster suede and nubuck.



The best suede dye must be the Simple Shine. I’ve tried a bunch of different dyes and haven’t found anything that compares. If you are truly interested in dying I would highly consider getting one.
I recently used suede dye myself. It was not too difficult! You just need to budget some time and have patience. Rushing or getting frustrated will put a damper on the whole project and impact the quality of your work. With suede dye, easily up-cycle or restore a suede product yourself and save both time and money in the process.
Hello, Jacoby! Thanks for your comment.
What more can you ask from such a product than what Moneysworth is offering? I mean I can’t believe they are offering a built-in suede brush and it’s actually high quality. I will revitalize suede like nothing else I’ve tried. Water is never getting in and leather becomes softer and flexible. I can’t believe I haven’t tried this brand until now. I even used it on some damaged suede shoes and it made them look almost brand new. And these were 3 year old shoes that have been worn a LOT.
Hello, Austin! Thanks for sharing your experience.